Getting Started - Camping
The key to enjoying the outdoors is being comfortable.
Social media will convince you that you need a 4x4, with big tyres and a rooftop tent, but they are wrong!
When it comes to getting outdoors, start with what you have, and use it while you work out what YOU need.
Before we begin, let us address the elephant in the room.
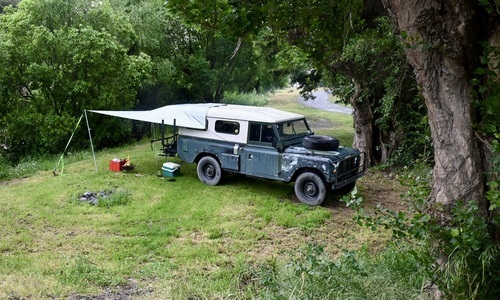
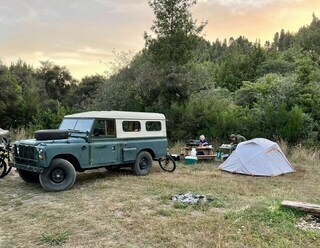
Yes, I camp in a 4x4.
Is it essential to what I do?
No.
If you read the YouTube comments on my videos, some people will tell you that their two-wheel drive van will go to places I take The Offender. I agree, and that is fine.
Before The Offender, I often camped using my Holden Ute or Holden Torana when camping with the boys. These were not practical due to their ground clearance for some of my favourite campsites. The Torana could not also carry enough gear for three adults.
So why did I buy a 4x4?
The Offender is a troop carrier. It has no rear passenger space, and it is all business. For many years I had considered a van, but a van is not my thing. I also wanted the additional ground clearance my other vehicles lacked, as a good part of my time exploring gravel roads and off-the-beaten-track. Therefore the bigger tyres are more suited to the rough surface, and I am less likely to get stuck when I go into places I should not have gone. Do I intend to go on rough 4x4 tracks? Not often because I do most of my travelling solo and need to be able to get myself out, but I want the option of exploring with clubs and friends.
Do YOU need a 4x4?
NO! There are many stunning campsites and places to explore in a standard family car.
Food and shelter are the two most basic needs for human survival and comfort.
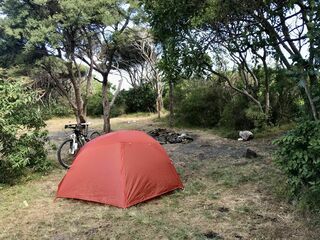
A basic tent will keep you dry, and the addition of a tarp will give you a living area, and shelter from the sun or rain.
Tent:
A tent could be the most expensive single purchase you make. With this in mind, there are several things to consider.
Purpose: Car camping? Hiking? Solo or with others? Shelter to cook?
Weather: Summer, Autumn? Will you camp for long periods in the same spot? In bad weather?
There is no one size fits as not all tents are the same.
Some are small and suited to hiking. These will be light but offer little room to spread out.
Larger tents are bulky to carry both for hiking and in a car.
Why I prefer a ground tent or car camping over a rooftop tent:
In New Zealand, we do not have dangerous ground-dwelling animals (except humans, but let us ignore them), so we have no advantage to being elevated, IMHO.
A rooftop tent might be fast to pitch, but it is heavy, compromising the handling and fuel economy of your vehicle.
You cannot nip to the trailhead without folding it up, nor drive back to town to get more supplies.
Drying and storage: Once a roof tent is attached to your vehicle, it remains there because of the weight and bulk of such a tent. Even if you camp three weekends a year, you are stuck with poor fuel economy and additional wear on your vehicle, but also the care and maintenance of the tent itself.
Alternatively, pitch a ground tent on your lawn to dry, or in the case of a smaller hiking tent, sprawl out in your spare room with the dehumidifier on while it pours down outside.
To maintain a rooftop tent it must be erected to properly dry and air. In order to do this, your car is parked in the driveway or the roadside if you departed camp without a perfectly dry tent, which is highly likely.
If you have a station wagon, van or hatchback, you can sleep in the back, saving money and time on set-up.
Awning:
Confession: Social media got me yearning for a vehicle-mounted awning. I convinced myself that it was more convenient and easier to set up. Costing it out for the coverage I have with the tarp, I was looking at over $3000 for a vehicle-mounted awning.
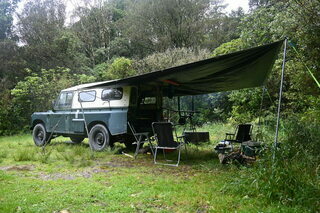
To increase your living space, consider a tarp from a couple of trees to the back of your vehicle, with your tent under it. Shade, shelter and a place to cook make camping much more comfortable. Tarps are an inexpensive means of expanding your camp setup.
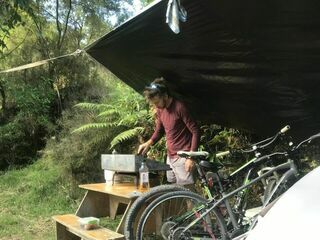
My tarp cost $60 at Mitre 10. Add in 3x $13 poles from K-mart and some rope from the shed (If you failed boy scouts, a couple of cheap ratchet tie-downs work a treat!)
All in all, about $100, and it is easily transferrable from vehicle to vehicle.
Once I got the ropes tied up correctly, it became easy. It takes under 10 minutes to set up solo and half that time to take down. I can lay it on my back lawn to dry or in my driveway. Try to do that in your shed with a vehicle-mounted awning. Not to mention stealth looks, security and fuel economy.
Some of my most memorable camping trips have been in a tent under a tarp in inclement weather. Knowing you are dry and have everything you need makes for the best memories.
Additional benefits of this awning set-up include the ability to peg one corner to the ground to block prevailing wind or rain (as seen in camping under a snowy mountain).
Perspective time: I can buy 15 tarp set-ups for the price of a decent 270 awning.
Sleeping:
Airbed or foam mattress? Chances are these are kicking around in your spare room. Either of these works fine. Grab sheets from the cupboard and a blanket, and you are good to go. No investment is needed. I recommend an extra blanket, rubber mats or foam bed roll under a mattress in cooler temperatures to prevent rising cold.
Food:
Pack easy-to-prepare foods you enjoy. You will not enjoy camping if you force yourself to eat nothing but plain rice and water because it is light and easy. Take the advice from someone who did this on their first overnight tramp, four nights. Solo.
Cooking:
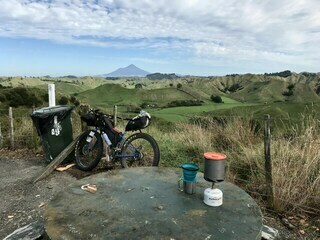
Cook with gas is easy and familiar. Portable cookers are inexpensive, simple and reliable, especially in the rain. Beware, portable canister stoves can be very inefficient on gas. Backpacker stoves (like the one pictured) are more efficient on gas, in my experience.
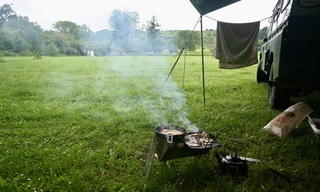
Fire cooking is a no-cost cooking solution.
Cooking around a fire is relaxing and social. Not to mention everything tastes good with a touch of smokiness.
Check that your chosen campsite does not have a fire ban, and you are good to go.
It is a good idea to take some firewood with you if your meal and warmth depend upon it.
Used pallets are an easy and free way of getting firewood.
Note: Fires are NOT permitted on Department of Conservation land.
Any stainless steel pot with a steel handle or cast iron pan will work in the fire. Pick one up for a couple of dollars at the local Salvation Army, a cast iron skillet cooks a killer steak. Pack a welding glove or 2 for safe handling of hot utensils from the fire ($15 from Bunnings)
Don’t forget the marshmallows!
Must have: (Not a comprehensive list, but a good start)
Loo paper: (Don’t get caught short. Many campsite loos will have no loo paper. If you have to go in the bush, dig a hole and bury your business. A shovel is very helpful to have. You can also bury your fire embers for safety when leaving camp)
First Aid Kit: Do not skimp, and know how to use it. You might find yourself out of mobile coverage and far from help.
Comfort: Good investments include:
Camp chair
Headlamp or torch
Insect repentant
Chilly bin (doubles as a coffee table)
Other things to consider:
Water: Many campsites require water to be boiled before use, using a heap of fuel. A water storage can with a tap is a great addition for minimal investment.
Glass: Try to avoid taking glass camping for obvious reasons. If you need a few cold beverages, tins are where it is at. Nobody likes broken glass or bottle caps lying around. Despite best efforts, it happens.
Rubbish: Pack it out, even if it is not yours. I challenge you to take a short walk into the bushes around the campsite and see what rubbish you can remove. I recommend carrying a pair of gardening gloves for this.
The same goes for your fire. Leave it tidy not all rubbish burns. Remove anything unburned and pack it out.
Leave camp better than you found it. The same goes for backcountry huts.
Take only pictures and leave only footprints.