Getting Started - Bikepacking
Bikepacking: The act of lightweight travel overnight/s by bike. Like backpacking, but on a bicycle.
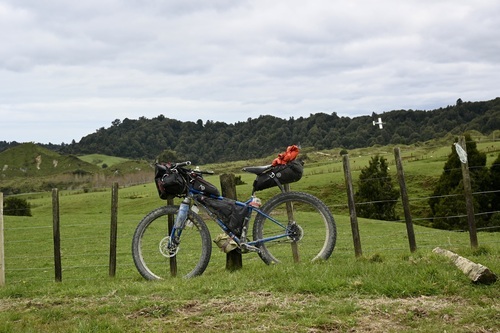
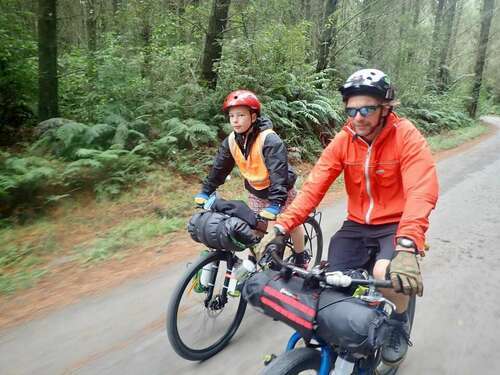
Photo: Through The Hills, Kiwi Rd summit.
As an early adopter of bikepacking, I found it removed some of the logistical nightmares of tramping while combining my love for bikes and the outdoors.
One thing I enjoyed the most was the number of crossovers, from gear to knowledge and of course the expense. But it need not be expensive.
As the name suggests, you’ll need a bike, and some way of carrying your gear, a pack for instance.
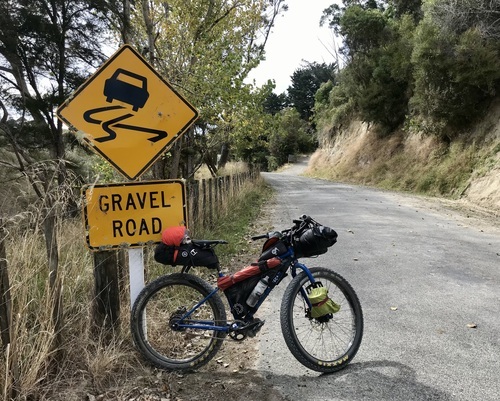
The terrain you choose to tackle will determine the bike, but the reality is, run what you’ve brung. If you only have a road bike, then obviously stay clear of the gnarly off-road stuff, but chances are you can fit a wider tyre, making it more comfortable.
The point is my first overnight trip into the Bridge To Nowhere before the trail officially opened. I rode in on what I had. A Giant STP, better suited to dirt jumping than cross-country riding.
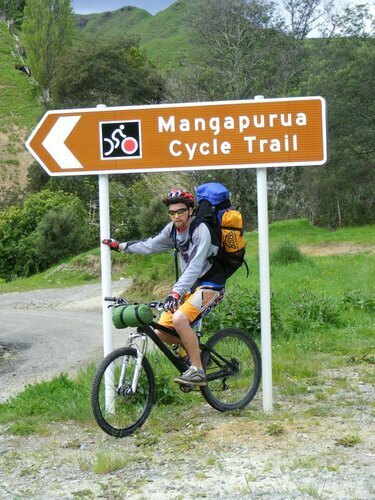
With a bed roll strapped to my handlebars, I packed my gear into a tramping pack and threw it on my back. All 14kg of heavy, cheap gear. Was it pretty? Not at all, did it get the job done? Absolutely! It got me hooked.
The amount of gear you need to attach to your bike will be dictated by the adventure you embark on. If you’re new to the outdoors, like comfort or plan to have your partner come along on the adventure more than once, consider staying in accommodation on the trail. A hot shower, a cooked meal and a bed can be a welcome sight at the end of a long day in the saddle.
Photo: The maiden voyage, November 2011
Tackling the trails of the NZ Cycle trail network are a perfect place to start your bikepacking adventures. The well-graded and maintained trails are centred around points of interest, offering beautiful scenery and generally having good services nearby. Shuttles to get you to and from the trail take the headache out of logistics. Out on the trail, you’re likely to not be too far from assistance should something go wrong. With this, it is a good idea to make sure you’re prepared with a basic first aid kit and the basics to repair your bike shall you need it, but more on that soon.
Getting weight off your back is something that cannot be stressed enough. Weight on your back is weight on your backside and that equates to an unpleasant experience after a long day of adventuring.
Gear location is a big consideration in set-up considerations. Balance is key, front to rear, side to side if packing forks and keeping the centre of gravity low help handling.
Ideally, repurpose gear you already have or borrow from a friend for your maiden voyage. Understanding how your bike handles and what gear to take will influence the best bang for your buck investment.
The number one thing to consider above all else, unless you are a camel, is how you will carry water. Many factors will influence the volume you will require more water you might need, but the ability to carry three full-size bottles will cover all but extreme cases.
Get it off your back, but be thoughtful of where you put it. 1 litre of water = 1 kg, plus your vessel.
Bottle-to-cage compatibility is important when the going gets rough.
Bottle cages on your frame are the easiest and cheapest. Start here.
If you’re cursed with a small frame or require more capacity, Cyclewerks has a double adapter that I used for a long time.
 I removed it to increase space in my frame bag, something I feel may have been futile. As I write this I consider if should investigate this setup again.
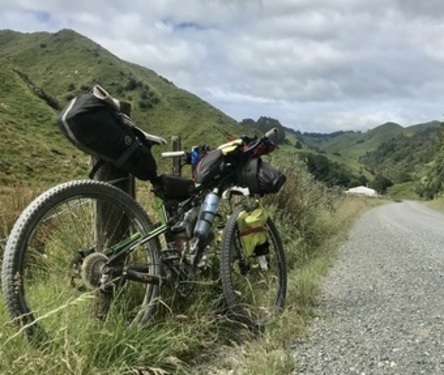
Bottles on the fork have been my go-to for a few years. This requires a good cage and bottle combination or being prepared to lose bottles, at the worst possible times. The additional weight is a consideration and needs to be balanced on each fork.
Photo: Double bottle adapter during "The Ohura Incident".
Carrying gear
With endless options for securing everything from the essentials to the comforts of home to your steed, let us look at the cheapest and most practical, starting at the back
Carrier/Pannier rack: 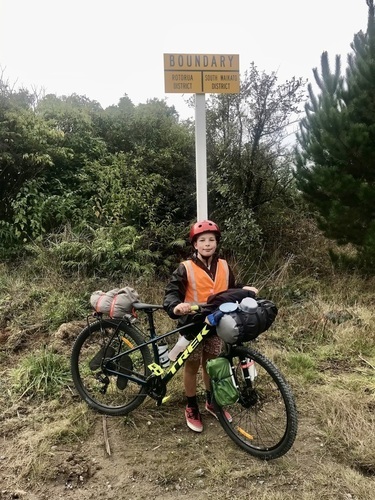 A rack of some description is the simplest and most universal option. In most cases, it is also the cheapest. It is recommended to avoid side pannier bags for multiple reasons, including clearance on narrow trails.
Handlebars:
Balance is important, not only side to side but front to back. A bit of gear on the handlebars is a good place to balance out the weight of your rack or seat bag.
A cheap and cheerful solution is to strap your tent, bivvy or sleeping bag to the handlebars using some grunt straps from Bunnings, they are tried and tested while coming in at a fraction of the price of Volite straps. Be mindful of wear points when using this option. Photo: Carrier, Handlebar roll & fork cages. Mini Grind 2021.
If you’ve got money to spend, there are various handlebar systems available from a rack, to a harness or a drybag with integrated straps like the Revelate Designs, Sweet Roll.
Seat bags:
Seatbag are an alternative to a carrier, in some cases they’re the only alternative conversely, sometimes a carrier is the only option.
Seatbags get a bad rap for “seatwag” the motion of seat bag sway while pedalling, While I have not experienced this, I have seen many seat bags wagging more than a Labrador at a family BBQ.
Seatbags also require functional clearance between the bottom of the bag and the wheel, for shorter riders this can provide a challenge. Additional consideration needs to be given to suspension travel in the case of full suspension bikes, dropper posts are incompatible with many seat bags and great care should be taken in the case of carbon fibre.
Cockpit bags:
Top tube bags. Great for stowing tools, a phone or stray snacks. Often cheaper than the feed bag, they will swallow everything from your pocket to offer you not just pedalling freedom but security from lost keys and phones on the trail.
Feed bags: These little stem/handlebar mounted pouches are brilliant. From swallowing a water bottle or can of fizz to stowing energy gels, hydration tablets and low-flying jet planes, feed bags are incredibly versatile. Photo: Seatbag, Cockpit bag, Frame bag.
Frame bags:
Last but not least, Frame bags. Incredibly bike-specific, frame bags are a large investment. While the big void between your legs is the best place to store gear from a weight distribution perspective, if you are intending to upgrade your steed in the future, chances are your frame bag will not fit. As such, there is a great chance it will be hard to onsell, especially if you have a full suspension bike or Ebike due to the non-standard geometry.
To maximise your frame-bag space and therefore value for money, it may be worth investigating custom-made bags from one of the many small NZ businesses that not only manufacture to order, but they've designed their gear based on thousands of KM’s of experience bikepacking in NZ and abroad.
That's a basic rundown on where to start. The evolution of gear and bikes is constant as needs change if you let it be.
One rule I have found to ring true with upgrading from basic gear to top-of-the-range performance options is every gram you look to save will cost you between $1-2. A 500g saving, could cost you $1000.
So you are ready to hit the trail?
There are a few essential bits of gear you need before heading out on your bike into the wilderness.
Aside from the obvious safety gear of a helmet, it is advised to have a basic first aid kit, including an emergency thermal bag. And don’t be shy about stuffing some loo paper in there too. Just in case.
Weather changes quickly in New Zealand and you’re a long way from shelter even in the best of circumstances, pack a jacket and a thermal top and a woolly hat.
This list is not exhaustive, so it is worth checking out Mountain Safety Council for more information on being prepared for the outdoors.
Because bikes are much more fun if you can ride them, you will need some basic, bike-specific tools. As well as the knowledge to use them.
Pump
Spare tube (correct size for your bike)
Tyre levers
Zip ties. 1/2 dozen in various lengths.
Allen keys
Chain tool
(If you are unsure, talk to your local bike shop, they will see you right.)