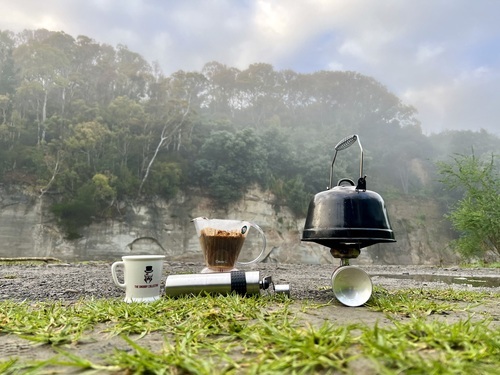
Coffee Outdoors
Coffee with a view began as an accident. It became my business.
Since my first coffee with a view 12 years ago, I have spent considerable time searching for better coffee. Both professionally and in the bush.
From instant coffee to Moka pot to Aeropress and everything in between, it has been road-tested, packed in, and swapped out, something of a relentless search for a better and more consistent brew in the backcountry.
I can firmly put my hand up and say the coffee-making process is a ritual. As a result, I did my very best to compare apples with apples when considering the popular options.
Cowboy coffee:
Ground coffee in a cup. Just add water.
A poor workman blames his tools, so this coffee is all technique.
Method:
The ratio of 7.5grams per 100 ml of water. (Plunger grind is best here)
Boiling water in first, then add coffee to the water.
Push the coffee down until it is all saturated. Do not stir.
After 4 minutes, use a spoon to scoop off any coffee material left floating on top.
Tips:
If you take sugar, put it in before the coffee.
Do not stir the coffee. The extracted grounds have sunk to the bottom, and agitation will cause bitterness.
Pros:
- Simple and effective with no extra gear
Cons:
- Grit in the bottom of the cup
- Messiest method to pack out. (Spent coffee weighs more than double its dry counterpart)
Aeropress:
The Aeropress appears in every coffee article ever. As a brewer, the Aeropress is undeniably versatile, great value and user-friendly. So, why do I no longer take it with me outdoors?
In a nutshell, weight and bulk are the two drawbacks that relate to most people.
In a professional capacity, I brew a specific recipe with a scale and timer. As a result, I notice the inconsistency of my bush brews, and they do not hit the spot.
Pros:
- Potential to make a bangin' brew anywhere
- Relatively cheap and unbreakable
- Good technique gets good coffee
Cons:
- Bulky and heaviest of the options in this review
- Waste to pack out (Spent coffee weighs more than double its dry counterpart)
- Good technique gets good coffee
Instant:
It is unfair to compare unbranded coffee dust with specialty instant coffee. As such, I recently put specialty instant and the beans it was made from the side by side. Aeropress vs Instant. I handed it to a coffee-loving friend to try, blind. While not indistinguishable side by side, half a cup to make the call says it is a close call, and I make coffee for a living.
Pros:
- Lightest in our test, 3 grams per 200 ml. cup
- Easy.
- Taste is almost indistinguishable from Aeropress.
- No waste to pack out.
Cons:
- Most expensive in test
- Your friends will want it too
Parachute bags:
Honestly, I wrote these off pretty early. If you are fussy enough to avoid coffee-flavoured dust from the local supermarket, your love of coffee probably saw you adopt an Aeropress or similar, So let us cut to the chase.
Pros:
- Lighter than a brewer
- No grounds in your cup
Cons:
- Limited choices of beans unless you pack your own chute.
- More trash to pack out (Weighs more than double after use).
- More expensive than beans
General tips and thoughts:
Water quality affects the way coffee extracts. Hard water extracts more, soft extracts less. This will impact the flavour of your coffee when using beans (or parachute bags) as you move water sources. Instant coffee doesn't suffer this inconsistency.
- Use filter-roasted coffee (not to be confused with filter grind)
- 60g of instant will make 4 litres of coffee. (based on our test coffee recipe)
- 60g of beans will make 800ml of Aeropress or cowboy coffee
- Single-origin coffees are typically enjoyed black.
- Light roasts offer more sweetness.
- Fresh is not the best. Using coffee a week to 10 days after the roast is best, even longer for Kenya and Ethiopia.
- Guatemala - Milk chocolate tones
- Brazil – Nuts and caramels
- Colombia and Peru – A bit of citrus acidity
- Ethiopia – Fruity and/or floral
- Kenya – Dark berries
Looking to buy? The Village Snob, at home.